Showing posts with label Home Improvement Follies. Show all posts

October 5, 2013

Plundering, Thievery, and Other Shenanigans

We have some family members (technically they are distant cousins, but they’re really more of friends to us) who live in Columbus, on a street where there are unfortunately a few homes that have been let go back to the mortgage companies.  It’s a pretty common problem in Central Ohio, and some neighborhoods like up around the Linden, Kenmore Park, and Oakland Park areas have been hit especially hard due to the predatory lenders that handed out loans like candy over the past several years.  

We were visiting at their house over the summer and got to talking about a house that is a few doors down from them that had recently been repossessed by the bank.  The detached garage had a broken down door, so we decided to take a stroll over and see if there was anything worthwhile inside, or if maybe there were some things that needed to be thrown away so they didn't attract pests.  There were so many pieces of garbage inside that garage, including an old wooden cable spool kinda like this one: 


I saw it and thought about swiping it to use for a project, but I didn't want to draw much attention since the residents across the alley were out on their back porch singing Kumbaya or something like that.  Interesting neighbors.   I found some other discarded items in the garage - some vintage Life Magazines (one of which was from June 1969 - the Apollo moon landing); also a neat old Reader’s Digest book.  Those items I was able to remove pretty stealthily, but I left the spool in the garage for fear that someone would call the cops on me for (basically) cleaning out the trash.

About a month and a half later I was back at our cousins' house, this time for their daughter's birthday party.  I took a few minutes to casually stroll down the alley and happened to notice that the spool was still in the garage.. obviously the door was still breached.  A quick removal and a drop over the neighbor’s fence into the back alley was all that was needed, and it was all mine!  Unfortunately I didn't think about spiders or other creepy crawlies until I got this thing hauled into the back of my car... good thing I had some duct tape with me (doesn't everyone carry it around in their car?) so I covered all of the holes in the spool so I could at least get it home without a brown recluse spider crawling out and murdering me.  I was absolutely sure that this would have happened, had I not sealed it inside of the spool with pink duct tape.  Have I ever mentioned that I don't like HATE spiders? 


I got the spool home and dissected it...  the "core" of it was nothing but cardboard, so I had to build a new center for support.  I used some scrap 2x4's and stood them on end in a pattern that kind of resembles something from a quilting class:


Once I had the center built, I added 3/4" hardwood dowels around the perimeter.  Part for decoration, part for stability, and part as book dividers.  The dowels were counter-sunk into the top disc of the spool using a 3/4" spade drill bit, then I ran 1-1/2" wood screws up through the bottom and into the center of each dowel, which I pre-drilled to prevent splitting.  


I put the metal rods back through the spool to hold it all together (there's actually nothing else bonding the top to the bottom, since the dowels are not pinned around the top), then I shot it with a few five coats of spray paint and added four swivel casters to the base so I could roll it around or spin it, if needed.  

I dragged it into my living room and started filling it with books... and more books, and even MORE books - fifty-five in all!!  I was shocked at what fit on this little coffee table! 


I am loving the final result - a perfectly functional and fun table, that I spent only about $15 building (dowels and spray paint).  Added bonus?  It's a movable footstool for my couches, and no one could ever say yell, "Get your feet off the coffee table!" because it's not a coffee table - it's just something I threw together using scrap wood and a spool that was otherwise destined for the landfill. 

March 28, 2013

Decorating Merry-Go-Round

I have re-arranged and re-decorated my living room *yet* again, in pursuit of a fun, happy, lively room that is easy living but contains some elements of high design.  I spent several weeks months scouring stores, catalogs, and the web, trying to find the perfect curtains to hang in my living room.  I wanted something colorful, bold, and beautiful... but also something that was durable and mostly cat-hair resistant.  I was looking for pre-made curtains at first, then after consulting my mom (a fabulous seamstress) I determined that the best way to get what I wanted was to make it custom.  Bah.   I am not much for sewing, although I enjoy the occasional home project... and curtains were outside of my comfort zone for sure.  My mom, bless her heart, offered to help with the planning and sewing, so I was off on my hunt again - this time looking for the perfect fabric.  During my pursuit I came across the wide world of indoor-outdoor fabrics - they're sun-fade resistant, they're generally made of polyester (so low-static); they come in a wide range of patterns and colors.  I swear I thought I hit the home decor jackpot!!  And then it came time to order said fabric.  You would have thought I was trying to purchase a unicorn, the way that I kept getting shut down on fabric websites... my local fabric store carried a nice selection of patterns, but nothing that really caught my eye.  I found a few online-only vendors who carried a pattern that I loved:


and happily placed an order at the vendor with the lowest price per yard. A few days later,  I was sadly notified that the fabric was out of stock, and they didn't know when they'd get more in... I was devastated!!   I placed an order with the next-lowest-priced vendor... out of stock there, too... It was a conspiracy created to keep me from ordering this fabric, let me tell you!

Then, as I was trolling the web, feverishly looking for "my" fabric, I found another pattern that caught my eye.  I figured it was a fluke - that the colors would be off, that the pattern would be too small... something was going to be wrong.  But I took a leap of faith, tapped my credit card number into the order form, and crossed my fingers and toes that this would all work out...


About a week later, I arrived home from work to find a big roll of fabric at my doorstep, all bundled nice and neat in a box, in some bubble wrap, around a bolt... it was packaged so well that I thought I'd never get to see it!   And then I got past the bubble wrap and plastic sleeve, and was horrified to learn that they'd wrapped the plain white lining fabric on the OUTSIDE of the bolt, leaving me with fourteen yards of fabric to transfer from one roll to another.....


You remember that exercise that you can do with a stick, a rope, and a free weight?


(Yep, that one. I curse the sadist gym rat who came up with it...)

Wrist-rolls, I think they call this torture device?   Yeah, well try doing that with fourteen yards of 54" wide heavy polyester decorator fabric.  You'll never look at a trip to the gym the same way again.  I had forearms of steel by the time that I was done with that Herculean feat!

At last I got to the good stuff - the floral fabric I'd hedged my bets on, since it was non-returnable clearance fabric.   I unrolled a yard or two onto my dining room table... and I. LOVED. IT.  It was gorgeous!  It had all of "my" colors!  (and did I mention it was on clearance?)

My mom came over a few days later, and we held a marathon curtain-sewing in my dining room, interrupted only by lunch and a trip to Lowe's for some new window hardware (I needed curtain rings, then I also decided that the curtain rods I had previously were not quite substantial enough).

Here's some photos of the fruits of our labor - I think you'll find that this is a little more punchy and fun than the last rendition of the living room!  I've also included some photos of new artwork that I created from some vacation photos I shot in Nashville last fall...  Love how those turned out!!


January 29, 2012

Living Room: The Big Reveal

I'm just going to get started by saying *WHEW*!!!!!!   This project was a handful - between the installation of the new hardwood flooring (all done by yours truly), the epic battles I've encountered with Macy's over the delivery of my new sofa & loveseat, and the shopping (and returning, and more shopping) I've done to furnish the room with accessories, I think I need a vacation now!!  
I'll just go through a quick run-down of photos of the room, and a few of the bigger items that I just love!   Enjoy! 

My new desk area - the peachy-colored rug had been hiding in storage for over a year; I had almost forgotten what it looked like!!! 


Overview of the room, complete with Sal and Frankie. 
My beautiful new sofas!  

An oldie but goodie.  This rocking chair belonged to Tyler's grandmother;  it was in quite a sad state before we got it.  My mom refinished it and brought it back to its original beauty! 

Antique market find of the month - a milk can from the old Pickerington Creamery.  I'm using it as a small end table...

Sal's new perch - the lid of the top trunk was torn to shreds, so I upholstered it with mattress ticking. Worked like a charm! 


Another fun antique market find - a ten-gallon stoneware crock.  It's also being used as an end table (like the milk can).  It's a little short right now; I'm going to build a little stand for it using some MDF and bun feet so it sits up about another 4-5 inches.  The tray on top may or may not get a fresh coat of paint... I can't decide if I like the floral, or if I'd rather paint it with a star (perhaps even a nautical star?) to match the crock.


A funky and fun parlor table I also picked up at the antique mall - it needs a little TLC but will soon get a facelift in an upcoming post... stay tuned! ;-) 


December 5, 2011

Reasons Not To Decorate For Christmas

I have all of my Christmas decorations laying in a heap in the basement, just waiting to be put up in the living room and dining room.  I had such good intentions... I was going to put them up on Thanksgiving weekend, but then I didn't.  Then I was going to put them up this past weekend... but didn't.   Now I'm wondering, with less than three weeks until Christmas, if it's even worthwhile to bother with this year??   I don't have anyone coming over for a Christmas party; we're not hostingany family events (that I'm aware of at this time) and I am itching to get my living room overhaul completed ASAP!

Overhaul?  Yep.  New flooring (removing the carpet and recycling it;  putting down hardwood flooring to match the adjacent kitchen).  This will hopefully be done in the next two weeks.  Then it's sofa time!  Just ordered these from Macy's this evening and cannot wait!!!!


October 1, 2011

Living Room In The Round

After spending the past few days staring at my living room and moving pieces of furniture around, I think I've got it pretty much the way I want it.  I had slipcovers on the sofas for a while, but last weekend I decided to deep-clean the upholstery to see if it would work for me.. I'm pretty happy with the results!


The chair at the desk is temporarily borrowed from the kitchen table.


Family things - the rocking chair belonged to Tyler's grandma, the clock on the wall was hand-made by Tyler's great uncle Rich as a wedding present for us.

Thinking I need another small lamp for the right side of the sofa...?

Another family thing - the coat tree was made by my grandfather.


I think I need more artwork...  going to paint the end tables, too. They were a dumpster-diving special, so I didn't get a choice in the color.  I was thrilled that I found four of them though! :-)

July 15, 2011

Oh, The Things I've Done...

Recently I made the decision to link my personal web journal/blog to my Facebook in the hopes that I can provide creative design and home improvement solutions to my friends and family!  Those who know me are well aware that my current house is in a perpetual state of change.  I believe that if I were to stop all of my projects, this would be something akin to stopping the rotation of the Earth.  As I don't wish to fall out of orbit just yet, it looks like I'll continue to make changes to our home to make it *just right*!

If ever anyone is working on a project of their own and is looking for technical support or advice, I'd like to offer my services in the following areas:

  • ceramic wall and floor tile installation
  • basic electrical wiring (switches, outlets, ceiling fans & lighting)
  • painting
  • basic sewing for the home
  • custom cabinet hardware how-to's
  • general home improvement for the do-it-yourselfer

I'll share before and after photos of my projects, whenever available.  I'll also try to include practical tips and solutions for projects that you can complete yourself!   I love to cook and bake, too... so don't be surprised if you find recipes and directions for my culinary successes here on my page! 


July 10, 2011

Have I Been Here Lately?

I've been horribly neglectful of my blog yet again... it's unfortunate that I must even refer to it as a "blog" as I'm now starting to think of it more as an online journal of my home improvement follies.  Although to call it a journal is even a bit of a stretch, seeing as how the word's origin in Old French means "daily".  Hmm...

And so there you have it - I'm a terrible excuse for a blogger and journalist.  I'm more like a periodical writer of web-based illustrated short stories.  But at least I'm steadily (if not sporadically) tracking my progress with my house... 

We're on our fourth house in just over nine years, and unfortunately the first three houses had little in the way of documentation of our improvement projects.  This house I wanted to handle differently - I wanted to be able to share my successes (as well as my failures) with regard to the redecorating of my humble abode and the slow-but-steady removal of poor prior design.  I've managed to paint nearly every single wall surface in the house at this point, with the minor exceptions of the stairwell wall and the upstairs hallway.  The closets have also been left untouched, although for the most part they were neutral to begin with... and besides, who paints a closet?  I do have two closets here that are serious contenders for a rainy day redecorating project.  The first is in our guest-bedroom-turned-catchall, where there's a hot pink hot mess going on behind some bifold doors.  The other candidate is the ginormous closet in my sewing room, where there's some delightfully trippy floral wallpaper that's just begging for a nice long soak with DIF paper stripper.  Alas, I would have to clean out said closets in order to redesign them... and frankly, I'm just not that motivated.

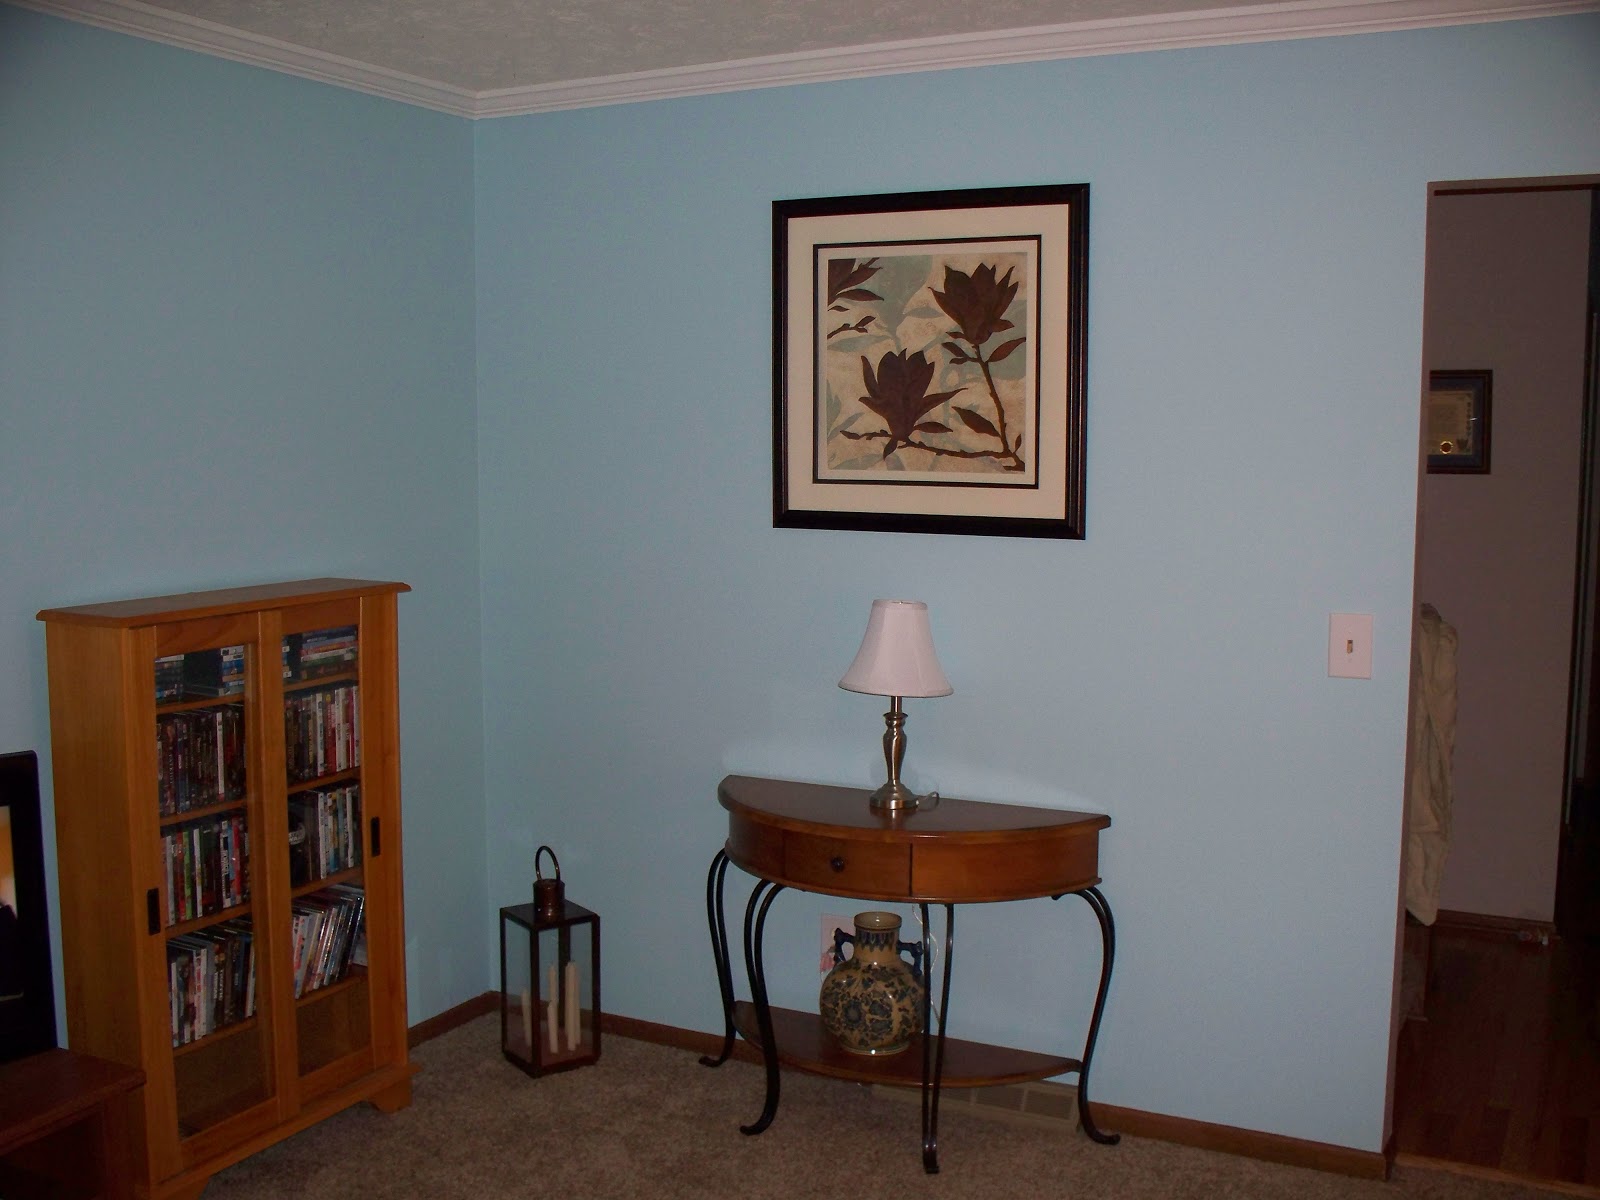
The latest project at Chez Voit is the living room and entry hall.  I've finally finished the painting of the walls, which has turned out quite lovely with the new shade of aqua-blue called Harbor Mist (by Valspar).  I also installed a modular organizer in the entry closet so I can hide our ever-changing DVD collection.  I had them all in glass-front cabinets previously, and decided one day on a whim that I wanted the cabinets gone so I could reduce the overly-casual feel of the living room. My behemoth of a burgundy velvet sofa (previously under construction) was swapped with the blue and green plaid sofas from the basement, which received some lovely (neutral) stretchy Sure-Fit slipcovers. Still needing to add more decorative pieces and perhaps an area rug, but it's getting there...

And now it's photo time!  (you knew it was coming, didn't you?).  

Living Room In The Round:


DVD organization, by IKEA (what else?):


 New kitchen/dining room bookshelves, also a Swedish design:


New Kitchen Valances. 
I designed them and my mom brought them to life.

I may be a competent seamstress... but a drapery maker, I am not.


Random picture - Frankie cat holding up the wall (or holding down the sofa).  
Either way, he's pretty stinkin' adorable.


Tune in sometime next month (maybe?) after I get the yard under control - we're going to force the driveway hedge line to rout later this week if I get my way!! :-) 


Happy Renovating!


May 30, 2011

The Grouting Project From Hell is DONE

When I first set out on the journey of redecorating my kitchen, I got a wild hair and decided it would be fun to re-tile the backsplash with something that was brighter and cheerier than the slate stuff that was there before.  I had fun ripping down the original tile (what a great stress reliever!!); then all of the sudden the fun came to a screeching halt.  I had to replace most of the fiberglass insulation, re-wire two outlets after they stopped working, replace all of the plastic vapor barrier between the insulation and the wallboard, and then put up new moisture resistant sheetrock to replace the plaster board that was behind the old tile, since *someone* decided it would be a great idea to install the old tile using Liquid Nails.  After the sheetrock was replaced, I put up the first incarnation of my tile design, which left a little to be desired.  So off it came, and that's how the wall sat for a while until I came up with my new design.  I started with the white tiles, then my mom helped with installing the colored "mosaic" band one crazy afternoon.  The marbles made their way in, a few at a time... and then I decided I'd had enough of the tile for a while.  This was in January.

I continued to utilize my kitchen, even having dinner parties and family gatherings, all the while regularly fielding questions about, "when are you going to finish your tile?"; "are you going to leave that purple wall like that?"; "didn't you start on this last year?"; "how lazy are you, anyway?"  OK, to be fair... no one asked me how lazy I was.  But I'm sure they were thinking it.

Tyler and I have created a new annual tradition for ourselves, taking the week after Memorial Day off from work.  Last year, we went to Hilton Head and had a lovely time.  This year, we decided to go on the cheap and stay local, so we're going to an Indians Game on Thursday night, then on Friday we're visiting the West Side Market to check out the Great Lakes Brewing Company and some other local eateries.  All in all, a reasonably inexpensive trip, and since neither of us has ever been to a home Indians game, we thought it would be worth the drive.

In anticipation of the otherwise-lazy holiday week, I wrote up a list of tasks I'd like to get completed around the house.  The list is a page long.  Double-spaced.  12 Point Font.  At the top of the list stood things like, "organize papers", "finish couch slipcover sewing project", "clean up spare bedroom", and right in the middle stood my nemesis, "grout the kitchen tile", along with its sidekick, "sand and paint the wall below the new tile".  Those who know me well, know that I rarely shy away from a house project.  Unless it's too big or too technical, I'm going to get it done (eventually). I wouldn't necessarily call tile "technical"; although it definitely takes some finesse.  I like to think that I'm pretty good at installing tile, but I also like to think that I'm good at sports even though I hurt myself frequently when playing, say, rec-league sports with folks from work. That particular pursuit has led me to no less than 3 X-rays, 1 MRI, untold prescriptions for painkillers and muscle relaxers and more than a few visits to my friendly neighborhood Urgent Care.  

Anyway, I decided that the tile needed grouted finally.  Not that it looked "bad", per se... it just was far from looking great.  Since I had installed each piece individually, there was no mortar bed behind it to look somewhat uniform; instead the wall looked more like it had a bad case of varicose veins because you could see the purple wallboard behind the gleaming white tiles. Below the field of white tiles stood an expanse of the purple wall board, just below the countertop.  There's an opening at the end run of my cabinets where there's just an overhang of granite supported by a heavy spindle.  When I first saw it, this looked like an enormous waste of space... since then it's become Cat Food Central.  The cats think it's just perfect because it's right next to the patio door, so they get dinner and a show since we've got an abundance of chipmunks that scurry through the garden most days.

Now we get down to the nitty-gritty of it all - the work.  (You know I was avoiding re-hashing it with my highly descriptive prose above...)  I started on all of this around 10:30am yesterday, with a phone call to Tyler to have him sand and wipe down the wall above the cat food dishes.  Yes, I consider a phone call to be work - I pay my general contractors at work 10% overhead for simply making phone calls to coordinate with flooring people, so phone calls are "work" in my book.  I had already "mudded" the wall late last week, but didn't bother to sand it down.  Tyler sanded it for me and vacuumed up most of the dust so I could get to round two - the paint.  I primed the wall twice with Kilz 2; then had to leave this to dry for a while, which I took advantage of by meeting my mom for lunch.

When I got back, I dove head-first into the grout.  I started working in little patches, mooshing (technical term) the sanded grout mixture into the spaces between all the tiles with my hand because a grout float wouldn't work due to the marbles sticking out further than the tile. Each little section then needed a wipe-down with a sponge, then after a few minutes the "haze" of gray started to form, so that had to be wiped off again, then finally buffed off with a scrubby-sponge.  I worked my way down the wall, each time following the laborious process of moosh, wipe, wipe, scrub.  My arms started to feel like Jell-O after a while because of the repetitive motion of scrubbing in small circles.  I think this must be how the Shake Weight works. Maybe I should create a new workout program using home improvement projects as aerobic activity.  Hmm...

In between all of the grouting madness, I baked a birthday cake for my Grandpa, a strawberry-ricotta cake (supplement to the birthday cake since we had quite a few -13 - people to feed) and also two loaves of oatmeal molasses bread.  My mom had a dinner today for Grandpa's 84th birthday, so the whole gang piled into her house for three hours of madness and stuffing our faces.  I *finally* got the tile grouting finished just after 11:00 last night; by this time I was bleary-eyed and exhausted so I shuffled my way upstairs to bed.  My left ankle was swollen from standing all day long - I literally did not sit down, except for lunch.  I even ate my dinner standing up at the counter because there was no room at the table to sit!

This morning I woke up late, got cleaned up, and went over to my mom's for lunch.  We had a lovely time and a great meal, then we headed back home. It took me about another two hours to put the finishing touches on the walls - painting the primed area, and making some touch-ups throughout the kitchen where there were assorted scratches, scuffs and bumps along the walls.  I scrubbed the countertops and polished them with granite cleaner, then loaded my accessories back into place.

I know you're still reading at this point because you know I'll be posting photos...


After I FINALLY finished everything up, I said a little prayer. If I were to die and somehow wind up in hell, I just know that someone will be standing there waiting for me with rubber gloves, a giant bucket of grout, and an endless wall of mosaic tile...

Happy Renovating (and Grouting)!


May 14, 2011

New Year's Resolution Updates

I was looking back through this year's posts and found my note from 1/3/11 about the things that we had to get accomplished here at the house this year.  So far, I've made a pretty fair dent in the list! 


  • get rid of the fire pit/chimnea in the backyard - this is going to a friend's house, just have to set aside the time to deliver it!   DONE three weekends ago.  Got rid of the chimnea, the firewood, AND a park bench! 


  • replace the mailbox (on order already)   DONE and I love the new box - it's so cute! 


  • cut down some old trees in the front yard - they're icky and sickly looking, so it's time to go!  It's like a whole different house.  I realized that with all of the over-grown crap in the front yard, our place looked a little like Boo Radley's house (from To Kill a Mockingbird)


  • build a custom screen door for our ginormous front-door - 42+ inches wide.  Scratched this one.  More on this later... 


  • paint the bookcases and the door in the dining room (paint chip selections to be posted shortly!)   Still haven't done this.  I have the paint, just haven't made the time.


  • tile the shower surround in the hall bathroom (this was wallpapered just last year, and is now peeling)  Done.


  • install mini blinds in the guest room.  I have the blinds... just didn't get around to putting them up.  The blinds are still in the guest room closet. Bah. 


  • paint the living room, hall, stairwell, and office.  This will finally complete the color transformation in our home... or what I refer to as "erasing the idiots who lived here previously".  2/3 complete, and loving the results! 


  • general house-keeping and maintenance around the back yard - trimming of trees and shrubs, removal of some older plants.  In progress...


  • replace the pump in our outdoor fountain yet again.  GRRRRRRRRRR  Solved this problem by removing the outdoor fountain and filling it in with soil for my herb garden expansion. 


  • paint shutters and front door   After further review, I decided that I didn't like the front door.  We're hiring a company to replace the door (including the jamb, threshold, casing, brick moulding, etc... with a heavy-duty steel door, already pre-painted (powdercoat) with a lovely shade of forest green.  The shutters will be removed and replaced with raised-panel style (as opposed to the louvered)  vinyl shutters in forest green.   


  • So far I'm quite pleased with the progress we've made on the list!  Not on here, but worth an honorable mention... we're getting a new window for the kitchen (same folks who are handling the door replacement).  I am having a cantilevered garden window installed above my kitchen sink so I can place potted plants there.  Our windows in this house have no sills, so the only practical way to get what I want (plant-growing space) is to get this style of window.   It's been something that I've always wanted to have, so I decided it was time to make the investment to get something I want!   It's going to take 8-10 weeks to get the window and door in (they're being custom made), so pictures to come later this summer! 


    Happy Renovating! 


    May 8, 2011

    Revenge of the House

    Well, the painting is done, and decorating is in-progress... next weekend's project will be to (hopefully) complete the couch re-covering and paint the DVD shelves.  I was really hoping that this project wasn't going to end like most of my other home improvement adventures, meaning that I would actually be injury-free upon completion.  No such luck... last night I managed to give myself a lovely contusion on the front of my right ankle as I was moving the antique Morris chair - there's a wooden frame underneath for the foot rest, and it slid out at warp-speed and crashed into my leg as I was carrying the chair back into the room.  This morning, I was hanging some of the artwork and I managed to slice into my right index finger with an "EZ anchor" wall screw.  While these things are brilliant for hanging heavy items because they bite into sheetrock, they are also quite efficient at tearing into flesh, especially when being sped along with an 18v drill.  At least I caught it quick enough so as to not get any drips of blood on the fresh paint! :-)


    Now that I've grossed you out,  here's a few photos, as promised!


    Showing the color change from the kitchen to living room:
        

     overview of corner area (more decor items still needed):


    opposite corner - the DVD case (on left) will be painted soon : 


    Another overview - again, still need to work on decor...


    It's getting there... but I must say, I LOVE this new color - it's so "happy" compared to the blah pinky-tan color that was in here before!

    Now I just need to determine what color to paint the DVD cases.  Not sure if I want to go with gloss white, or a light sea green color (to compliment the walls) or even a deeper blue like the indigo that is on the accent table in the second and fourth photos.  The Morris chair (antique chair with the teddy bears) may get a new cover once the couch is completed - leaning towards a soft denim-type fabric to make a casual slipcover.  The striped club chair is also going to get a new cover, but I think I can get away with buying one from Sure-fit since it's a pretty standard size.  Not that I don't enjoy making my own slipcovers... but it's sure a heck of a lot easier to buy one that will fit right out of the package!!

    Happy Renovating!

    May 7, 2011

    Let There Be Paint!

    Today's scheduled painting project got off to quite a late start, courtesy of my non-functioning alarm (thank you, South Central Power for the overnight outage with no apparent cause).  I intended to get the painting completed and all of the decorative items hung/placed in our living room, but it seemed as though I wasn't going to get it done!   I started painting after noon, and lo and behold, I was able to get the entire living room and a good part of the downstairs hallway painted with my new favorite paint - Valspar Interior Flat Finish from Lowe's.  Last month I got a coupon in my e-mail to get this stuff for only $15.97 a gallon, so I jumped on that deal (regular price is $24.97).  I neglected to read the label when I purchased it, lest I would have seen that it's a) scrubbable when dry; b) water only clean up (didn't even need soap!!) and c) "Thick One Coat Coverage".  Now, when they say this is thick paint, they're not kidding - I honestly thought there was something wrong with it because it was nearly the consistency of cake batter!!!! Then I read the label on the can and saw that it was their "thick" formula.   I was slightly annoyed because I thought this was going to make it not go so far, or that it would be difficult to apply... but I was dead wrong.  It went on the walls fabulously, had virtually no spattering (unlike some other thinner paints when you roll them) and clean-up was a breeze!  It's rare that I find a product that I use in my house and I think to myself, "I don't think I'll ever need to buy anything but this brand from now on," but I'm seriously thinking that very thought about this paint!!  For those folks who are not fans of flat finish, I have to admit that this is probably closer to an eggshell - it's clearly not that flat "builders grade" paint that you think of when you imagine flat finish... it's got a very slight sheen to it, and it looks lovely on the walls of my living room!  

    Photos to be posted later this week month season... need to get the new curtain rods and artwork hung up and then we'll be ready for a photo shoot!

    Happy Renovating (and Painting)!

    May 1, 2011

    The Mad Hatter, Outdoor Edition

    Yesterday was dedicated to the clean-up and reorganization of my garden.  I had a rather lovely collection of green onion sprouts in various states of maturation, along with dandelions, grass sprouts, random tree seedlings, and the occasional clover.  While all of these plants might lend themselves nicely to a tasty culinary adventure, I decided that they really don't belong in my herb garden.

    I started by pulling all of the sprouts, weeds, and other icky things, then moved on to paring down the yard ornamentation.  We had a cast-iron chiminea, courtesy of my folks' generosity... they didn't want it and pawned it off on us last Easter.  We also had a plastic-resin park bench which sad sadly in the corner of the garden, just waiting for someone to sit on it.  Mind you, I'm not much of a garden-sitter, so the bench has gone unused for the nearly three years that we've lived here.  Fortunately, it was inherited along with the house, so I had no real emotional or financial ties to it!  The chiminea and the bench were happily re-purposed into the backyard of our friends, Erin and Vinnie. They're getting ready to build a deck and the chiminea will make a lovely addition to their outdoor entertaining space, and the bench will be utilized for photo shoots for Erin's growing photography business (shout-out to EPC Photos!!!) We also moved an old concrete bench that was up against the house and put it over in the corner for a bit of visual interest.

    Anyway, once the garden area was clear of ornamentation, we removed the old water feature/pond thing from the center of the "island".  Here's how the garden looked many moons ago, when we first bought the house:


    Over the course of a year or so, the fountain in the center of the little pond thing stopped working, then the goldfish croaked and the water got all murky and nasty.  We replaced the pump, then the liner sprung a leak and we had to replace that, then the replacement pump took a nose-dive too.  Seems as though we were never destined to have a water feature in the backyard, huh?  Not to mention I found no less than 5 dead birds in the water over the course of two summers... it was pretty horrific to have to scoop them out and plunk them into a Kroger sack for disposal.  We had different theories about why the birds died... my dad believed that they were trying to get a drink and got their wings all wet, then couldn't flap their way to safety.  I thought that they were flying into the patio door (glass) and getting dazed, then they would flutter back over towards the water and fall in.  Regardless, it was pretty gruesome to have a bird-murdering waterscape in the yard, so it had to go.

    We removed the water, then the liner came out, and I filled it all in with some gravel (for drainage) then some peat and potting soil.  I picked up some lovely herb varieties at The Andersons... Sweet Basil, Genovese Basil, Delfino Cilantro, Greek Oregano, Mojito Mint; then I also had a sage and thyme plant that toughed it out through the winter, thus earning themselves a new plot in the herb garden!

    Here's some pics of the new and improved garden space!

     
                        (please excuse my mulching messiness...)


                                                                         Hands down, still my favorite feature of the yard - my lilacs. 
                                                                                           I'm not sure how old these shrubs are, but they're very near 20 feet tall! 


    Next up for the garden?  Tomatoes, Zucchinis and Peppers (oh my!)

    Happy Renovating (and Gardening)!

    March 23, 2011

    Insurance Tests Kinda Suck...

    OK, OK... not "kinda"... more like "really".   They suck the life out of you, draining every last drop of energy from your body as you're frantically studying for a test that you a) don't really care about; b) don't really want to take; and c) are probably not going to remember once you click "submit".   I am currently enrolled in a program in order to obtain an insurance and financial planning certification, and I haven't quite figured out how this relates to anything I do in my work or in my personal life.  My company is big on having employees participate in these programs, so last year I jumped in feet-first and signed on for one of these "designation" courses.  Unfortunately, I am not a self-study-type person, and I can't learn much of anything from just reading a book about finances... this is partly due to my lack of interest in the topic, and partly due to the fact that I tend to transpose numbers when calculating.  I'm a BIG fan of Excel and other spreadsheet-creating software because it has some fail-safes built into it so a single mis-keyed figure doesn't lead your whole string of numbers astray!  


    How does all of this relate to my (typically) more interesting home improvement saga?  


    I have an insurance test scheduled for one week from today, so I get to put ALL of my home improvement projects on the back burner so I can study (cram) this weekend.  BAH.  Meanwhile I've got swatches of gorgeous new paint colors on the living room wall, a custom-sewn sofa slipcover that's less than half-completed, beautiful new curtains hanging on old ugly curtain rods, and a pile of blank artist's canvases just waiting for inspiration so I can create some new abstract artwork for my living room and kitchen!


    Happy Renovating (and Studying)!


    March 12, 2011

    Mission: Slipcover

    This weekend's pet project is slipcovering a MASSIVE sofa that we have in our living room.  We bought it when we moved into our last house (in Tennessee).  It was perfect for that house because the room it was in was also massive, and needed some kind of visual "divide" to separate it from the dining area and kitchen.  When we moved into our current house, I first placed this beast in the room that has since become our dining room, and there it sat for well over a year, until we moved the plaid sofa set to the basement when it was completed... the living room was very empty at that point, so we had to move the Beast in there to have somewhere to sit!

    The sofa was originally a beautiful garnet color - went fabulously with our old house and decor scheme, but was decidedly a little too stuffy for this house, which has slowly become more casual and funky (in a good way) as time has passed.  The living room opens into the Technicolor madness that is my kitchen, so I definitely need it to be equally cool and funky so that it "flows", you know?

    Anyway, the sofa needed a makeover, and I was bound and determined to do this on the cheap and easy.  Enter a great recommendation from my lovely friend Sharon (of Decorating is Bliss Ms. Magpie Designs).  I asked for her advice on what to do with the sofa as I was originally thinking of blue or even a pale green... she recommended an ivory or tan so that it's neutral, and directed me to Fabric.com, and to a great linen-look decorator fabric called Osnaburg Natural. It's somewhere between a fine linen and a feedsack texture, but it's soft to the touch.  Perfect for a casual-looking sofa!

    The sofa pillows are completed so far, and I've gotten a start on the arms.  Next up are cushions, but the rest of this weekend looks like it's going to be devoted to studying for an upcoming insurance exam (boo!)

    Here's some photos, for your viewing pleasure:

    Before:


    During:
    (the fabric over the cushion is temporary - just so it doesn't look bad while it's in progress!) ;-)


    The walls will soon become a sea blue color - surf-like with a bit of a greenish cast.  Can't wait to dive into this next project!!


    Happy Renovating (and Slipcovering)!